Copy
'M' to mark all verts
Hit '3' to rotate 8 times
Paste-On-Top.


Ok let's finish this room. Sctut06.orf from the zip file picks up here.
There are two way we can do this.
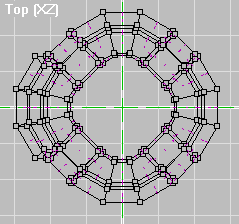
| In Top View mark the faces as shown below.
Copy |
CTRL-V to change to Vert Mode.
'M' to mark all verts Hit '3' to rotate 8 times |
CTRL-F to change to Face Mode
Paste-On-Top. |
|
|
|
If we use the method described above we would
still have to go back and texture the 3 rounded sections
we didn't do on the previous page. But
since 1) I hate doing texture alignment and 2) I'm lazy I'll show you
an easier way.
| Mark the faces as shown below. (The quarter that's already
aligned).
Copy
|
'M' to mark all faces.
Delete all faces Paste-On-Top |
Ctrl-R to change to Vert Mode
'M' to mark all verts '3' to rotate 8 times |
 |
 |
 |
| Crtl-F to change to Face Mode
Paste-On-Top Ctrl-R to changes to Vert Mode |
Ctrl-R to change to Vert Mode
'M' to mark all verts '3' to rotate 8 times Crtl-F to change to Face Mode Paste-On-Top |
Ctrl-R to change to Vert Mode
'M' to mark all verts '3' to rotate 8 times Crtl-F to change to Face Mode Paste-On-Top |
 |
 |
 |
Now all thats left is the window recesses for the windows and to cap
off the top and bottom.
Sctut07.orf from the zip file picks up here.
First the window recesses:
| Mark all verts and rotate the entire room as shown to the
right. Change to Face mode and mark the 3 faces. The best way
in this case is to make the face current then mark it by hitting the spacebar.
Copy, mark the same 3 again and delete them. We're putting the window recess on the right side so delete the same 3 from there also. Set the grid in Top View to 50, Paste-On-Top, then move the faces to the left 50 units to work on. Mark the 3 faces and Extrude them. You want them to extrude along the X-Axis -15 units (to the left 15 units). Remove Extra Verts. |
 |
 |
Delete the 3 faces we used to extrude from and
the 2 I have circled.
In the 3d window, set on Texture with Outline, use SHIFT-CLICK to texture the new faces so it looks like mine to the right. Remember to reset Default UV's and align textures. |
 |
| Now mark and copy the faces
of our new section. Mark the again move them onto
Remove Extra Verts |
Paste-On-Top
Change to Vert Mode and mark the
Rotate it around to the opposite side. |
Move it onto the sphere (50 units to the left.
Remove Extra Verts.
Save |
 |
 |
 |
 |
Make the Front View active and set the grid
to 100.
Mark the verts as shown to the right. Copy, Paste-On-Top, then move the new verts 300 units to the right to work on. |
 |
Mark 4 verts at a time and insert faces as shown
to the left. Whatch the Front view to make sure all the normals face down.
Combine faces 1 and 2. Now combine faces 3-4. Finish combining faces so you end up with 5 as shown to the right. |
 |
| Mark the 5 faces and move them 300 units to
the left. Remove Extra Verts.
Make the cap for the bottom the same way. Texture and align the new faces. Save............. You're done. Check it out
to the right.
It may have seemed long going step by step but now try running through this tutorial again. I'll bet you fly through it. You learned how to apply Lathe, Extrude, Copy, Rotate, Paste-On-Top and some other tools to make building an interesting structure simple, fast, and fun. I hope these techniques help you spend more time being creative. I'll be adding some more building techniques in a week or so. I promise they'll be shorter. |
 |
Back to Papacat's main page