| Animation Part 1 |
|
The first object is going to be a switch with 2 moving handles. Here's the orf . Download it to follow along. I've made a base and 2 handles in D3Edit. Remember! You can't ADD pieces once you're in OOFEditor so make sure everything you'll need is in the ORF. |
![]() |
![]() |
I open the orf in OOFEditor and the 3 pieces are listed . You could leave them all as "Unamed#" but it's easier if you name them. Highlight the piece and under the Properties Tab change the NAME field. Now make the handles children of the base. Although not necessary for this exercise it's a good practice. | ![]() |
| The X,Y,Z that you see is a Pivot
Point. We need to put Lefthandle's Pivot Point where we want it to
rotation axis to originate from. With Lefthandle selected, go to
the Properties Tab and pick 'Affect Pivot only' and adjust the Y
setting so the Pivot Point is where you want it.
Now's a good time time to remember to SAVE. There's no undo. You're best defense from self-inflected wounds is to save often and save multiple copies. |
![]() |
|
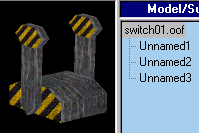
To understand animation of an object there are 4 main terms you have to understand: Frame, Key, Rotation, and Translate. First we need frames for our animation to take place in. Down in the bottom right corner is Time Configuration. Leave START at 0 and set END to three. You'll see the Frame Marker change to 0/3. This means the Marker as at '0' and the last Frame Available is '3'. You might be thinking 0 through 3 equals 4 frames. Think of it this way: An equal increment of time exists between 0-1, 1-2, and 2-3. As we add keys it will become clearer. |
![]() |
| With LeftHandle selected and the Frame Marker at 0 go to the Animation Tab and pick Rotational. This tells The oof that the sub-model has a Rotational animation key at 0. You'll see an oval appear at the left end of the Animation Bar. The oval tells you that the selected sub-model has an animation key at that location. Advance the Frame Marker by clicking the > button. The Marker should now read 1/3. Put a Rotational key there. Finish with LeftHandle by assigning a Rotational key to 2/3 and 3/3. With LeftHandle still highlighted your Animation Control should look like the one below. |
![]() |
| An important point is that a key is only for one sub-model. Select RightHandle. You'll see the oval's disappear. The ovals represent existing keys for the Active Sub-Model. Assign a Rotational key to all four locations as we did for the LeftHandle. Save. |
| Time to start moving our sub-models. First, so we can see the
path our sub-models will travel turn on View Trajectory from either the
Animation Tab or the Animation menu.
Highlight LeftHandle and set the Frame Marker 1/3. That's right! 1/3 not 0/3. When you move a sub-model at a Frame Key you're telling where you want it to have moved to by the end of that Frame. The motion will start at 0/3 and reach the position we set it to at 1/3. |
| Angle is the amount of rotation in
degrees you want the sub-model to turn. Below Angle you see Axis
of Rotation. By setting the L/R (Left/Right) Angle and the U/D (Up/Down)
Angle you define and AXIS that originates at the Pivot Point. It's
this defined axis, not the X, Y, or Z axis that your sub-model will rotate
around.
At L/R = 0, U/P = 0, the Axis of Rotation lays on the Z axis. |
![]() |
| We want to the Axis of Rotation to be parallel to the X axis.
Turning it 90 degrees does this.
Now Rotate the model 45 degrees. Key it in and Enter or click the spin arrows and drag up while holding the left mouse button down.. Using the Drag method you'll see it move and the Trajectory be traced. You should now have what is showing above. |
| With the Frame Marker still at 1/3 HighLight RightHandle and Rotate in NEGATIVE 45 degrees. | ![]() |
![]() |
Move the Frame Marker to 2/3.
Select leftHandle, rotate it -90 degrees. Select RightHandle, rotate it +90 degrees. |
![]() |
| Now we want to put both handles back to their starting positions. For this example it's pretty easy but image if we moved 3 or 4 times and changed the angle of the axis each time. Do you think you could figure out the exact angle for the axis and angle of rotation to put you back to start? Maybe after half an hour of math projections. Luckily SuperSheep gave OOFEditor a tool that does all that work for you. |
| With The Frame Marker on 3/3, click "All Subs to Start". OOF
Editor calculates and applies all the necessary keys for the submodel to
bring everything back to the position their original positions. Actually,
we didn't need to put keys in 3/3. The 'All Subs to Start' would
have done that also.
SAVE! |
![]() |
| Let's test the animation. In the Time Configuration box, set
the Animation Length to 3 seconds. Start and End should still be
0 and 3. Move the Frame Marker back to 0 and hit the play button.
Did you notice in the second (1-2) frame the handles moved faster? All the frames are the same length time. In the second frame the handles have to rotate twice as many degrees in the same amount of time so their move faster to execute their movements in the allotted time. You download the oof finished to this point here. I'll address this on the next page and cover some other points on taking advantage of Frames. |
| [ BACK ] [NEXT] |