MAKE MESH GLASS BREAK
This is a good beginner level look into customizing .gam files (table
files). What's a .gam file? Descent 3's main .gam is TABLE.gam.
Inside it you'll find an entry for every texture, object, and sound that
exists in the game. These entries control the behavior of these entities.
They tell the game whether an object is a robot and how it behaves or that
a texture is transparent, a force field, if it moves.... and if it's breakable.
The first thing we have to do is get into the table.gam file; not to
edit, just to export from. The table.gam file is inside the d3.hog.
Once we have table.gam we'll need to make our own .gam file.
You'll need a Hog editor and a .gam editor. Go to GameEdit's
'Editing Files' page and get them. I used "Hog2 Workshop" by
Dark Knight and "gamTool" by Aldel. (Thanks to both for the utilities).
 |
Use your hog editor to open d3.hog.
Find Table.gam, mark it, and export it. Luckily HOG2 Workshop
lists everything alphabetically.
While we're here find MeshGlass.ogf and export it also. An .ogf
file (Outrage Graphics File) is the actual graphic used for the texture.
I'm not sure if 2 textures can use the same .ogf so I'm just playin it
safe. |
 |
Before we get to far rename MeshGlass.ogf. I called it myGlass.ogf.
Now start up gamtool. When gamTool starts it automaticly opens
a blank table for you to work in.
Leave it there and open Table.gam. Find Texture:MeshGlass1, copy
and paste it into Table1.
Save Table1 and give it the same file name as the mission you'll use
it in.

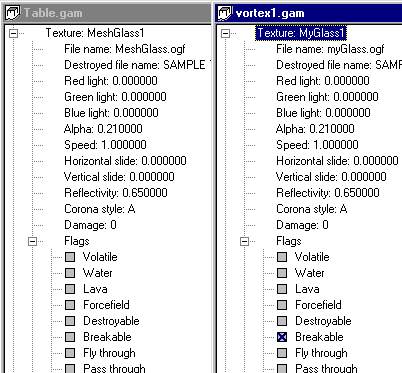
Open then branch. Change the name of the texture by dbl-clicking the
name and typing over it. This is the name that will appear when you choose
it from the Texture Palette.
Go down to Flags and check breakable. Save the .gam file.
To the right you see the original entry for Meshglass1 and ours.
Rememer that you can add as many textures, objects and sounds to your custom
.gam file as you like. |
 |
Now lets get this texture into your level.
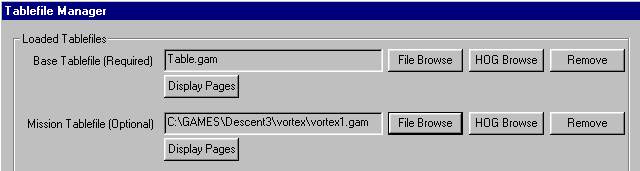
Start up D3Edit and BEFORE opening
the room or level go to DATA and open the tablefile Manager.
Enter the path to your custom table in the Mission Table field by using
File Browse.
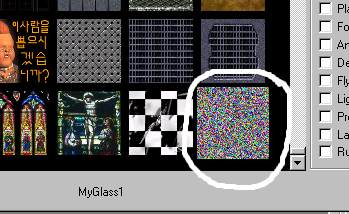 |
When you open the Texture Palette and pick Mine Textures
your new texture should be all the way at the bottom. That's it to
the left. Don't worry, the correct graghics will be used by the game.
Pick on it and you'll see the name you gave it at the bottom.
Since you can't really see your texture you might want to put regular
MeshGlass1 at first, align it, then replace it with yours.
Now just follow the basic rules for inserting and scripting glass. |
The only thing left now is to add your .gam file and .ogf file when
you assemble your .mn3. Good Luck.
[ MAIN]