|
One of the most important things about creating a room with extrude is planning ahead. This is very difficult for me to do because I like improvising as I go rather than sitting down and drawing it all out in my head or, better yet, on paper. I'm not saying that you have to have your whole level planned out with all the pillars and pipes included, you just have to have a general idea of the texturing and where the adjoining rooms will be. I'm showing that picture to the right as an example of bad planning. I didn't plan ahead on this and it took me almost 3 days just to get this one simple room to work correctly. Though I guess this pictue will only mean something to me ;).
|
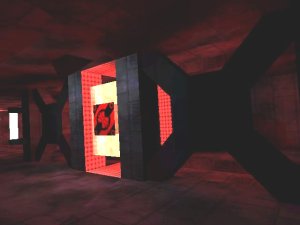 NOTE: When making complex looking rooms like this (especialy when there are many portals involved, the area inside the stucture is actualy a differant room) it always pays to plan ahead.
|
|
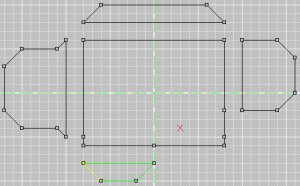
Once you have an idea on how your room will look you can start the extruding portion of it. I want my room to be a large, complex looking hallway. I already have the room pieced together out in my mind (and on a piece of paper if I forget ;) of what I want it to look like so I start by making the 'pieces' of the room. The picture to the left is the Front (XY) view of what I've made so far.
|
|
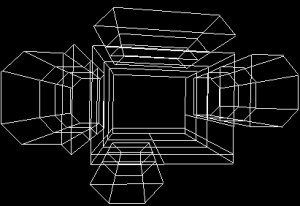
After that I marked all of the faces and extruded them 60 once, then 40, then 60 again. Notice that I have split some of the faces up with vertexes that I dont really need. These extra faces I'm creating are actualy going to be used for seperate textures, doing this helps make your room a little more realistic. This is one place where the planning ahead comes into play because you have to know know not only where the portals to the other rooms will be, but how large these portals will be. Doing this ahead of times can save a lot of hassle with T-Joints and bad shells. The picture to the right is the Top (ZY) and the 3D wireframe view of it (the 3D is kinda hard to make out still).
|

|

|
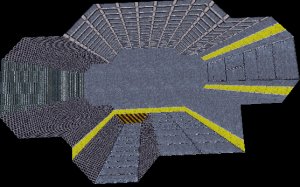
After doing that I took all of the seperated sections (I keep them seperated because it allows me to view all of them easier) and pushed them together again. Then I deleted the faces and removed the extra verts, thus 'sealing' the level from a bad shell. Then I added a bit of creative texturing which I really like. The first picture is the "Front (XY)" view again with all of the segments condensed into one (notice that the normals that used to be blocking off walls to the other segments are deleted) and the second picture is a textured view of the room so far.
|
|
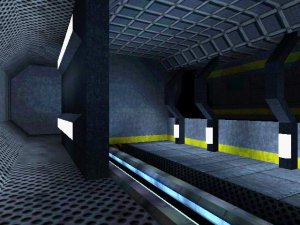
Then your done with the 'frame', or shell, of the level. In the next lesson I will show how to add pillars and other obsructions to give your level a sence of realism. I finished this room with some pillars and lights and took a screenshot in Descent3, I think it turned out great.
|
|