| Download the D3Edit files
used in this lesson. |
|
|
Lesson 6 Our First Problem, Our Second Room For this lesson you will need the completed level file from Lesson 5. Open D3Edit and open up your level (thelevel.d3l) Note: The problem we are about to fix will need to be done every time you import a room to make a level, otherwise your entire level will be off the grid. EVERY designer should be aware of this!!! Our first problem has an easy fix. When we created our level we used the New Level-Import Room function. The result is that our level is not aligned with the grid anymore (it's between the gridlines when grid is set to 1). This will cause you to slowly go insane as you try to align other rooms and objects, since new verts and faces can only be placed directly on the grid. This isn't to say that we won't stray off the grid as we build, but we want to start clean. What we need to do to fix this is
move all of the verts back onto the grid. This will fix the entire level since
there is only one room in it so far. If we had more rooms connected already,
this process would cause other severe problems. This should be the first thing
you do after creating your .d3l (level). The only reason we waited in this
lesson is that I wanted you to have a little fun first getting the level to
work. |
|
ex. a ex. a |
Make sure you're in vert mode. Using
the left mouse button, drag a box around the entire room, making sure that every
vertex is inside. When you let go, all of the verts in the room (and level)
will be marked. Now open the Geometry toolbar (R button). A lot of people
call this the Room Edit toolbar...R = room, makes sense! Notice down in the Vertex
area there are 2 buttons that show no function when you hover the mouse cursor
over them (ex. a inset). The bottom button of the 2 (circled red in ex.
a) will snap the current vert to the nearest grid point. This also
will "pull" any marked verts with it, aligning the entire room. |
|
With all verts marked and with a 2D pane selected, click the button circled in ex. a. This should be done in all 3 of the 2D panes to ensure that they line up on all axes. Once again, this should be the first thing you do upon creating a level using the New Level-Import Room function. Thanks to Sirian for this all important tip! Back to Building! ex.
b
ex. c Notice that the new room is now current. Right
click in the 3D view and select Display current room view. Use ctrl-tab
or the Window menu to open the current room window (ex. d). |
|
ex. d ex. d |
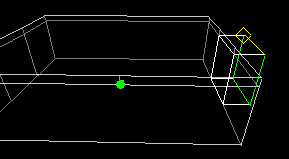
Check the dimensions of the new room using the grid (not shown in
pic for purpose of clarity) - 20 x 40 x 40 units. Remember how I planned ahead
on the extruding of room 1 so that we would have the thin light strip around the
top? Well I did the same thing here. I left 40 unit sections on 2 walls by
placing verts where I wanted the walls to be divided. I knew that I would want
to have a 40 x 40 room or tunnel in the wall. There are other ways to attach
rooms, as we will soon find out.
|
|
Notice the white lines in the 2D panes...that's the outline of
room one. It can't be edited right now, it's just there for reference. In the Front
pane you can see the fat horizontal line of the origin. When we created our
level we also moved down along the Y axis 100 units.
If you look at the 3D view textured, you will see that ever so popular multicolored texture. Open the Texture toolbar (Tx button). The custom tab at the bottom is empty, but the level tab is not! All of the textures used in The Level are there! Cool. Use the Lego Floor texture on the floor - make the face current and apply to current. (note that in World View the floor textures of the 2 rooms are perfectly aligned...this won't always be the case). Texture the other faces. If you'd like to use different textures, go to the Available Textures button and use Mine Textures. Note: There are textures, especially glass or Object textures, that have some degree of transparency. Do not use transparent textures on shell faces (outside walls - see Shell in Lesson 1) because you will get unwanted visual effects from being able to see through to the empty void outside the level. Save your level. Ok, our room is looking pretty good,
but it's kind of small. Extrude the room again in the same direction, only this
time use
the Extrude button on the Geometry toolbar so that we don't create
another room. Flip the normal of the
current face before extruding. Let's extrude 20 units along the x axis...delete
base face after extrusion. The result is ex. e. Actually in the example
I've fixed a few textures. Go to textured view and you'll see that all of the
new faces are the texture of the originally extruded face. This can come in
handy someday. Go ahead and put the textures on the floor and ceiling and save
your level (in World View). |
|
ex. e ex. e |
Ok I know that isn't much of a room addition, but with more
extruding this new room could get interesting.
Perhaps this can just be a short tunnel to the next room in our level. Quite often tunnels are actually small rooms - there is no minimum size for a room, technically speaking. We can't end this lesson already so... |
|
ex. f
|
Refueling Centers Every level should have at least one of these. Refueling, or energy centers are actually rooms. A room designated as an energy center will refuel a ship that is at any location in the room. the room can be small or gigantic. In our case we will make our new room a refueling center. In the Current Room editor window, go to the window menu and select Room Properties (ex. f).
|
|
Name the room Energy 1. You can designate a
room as a refueling station, a goal for capture the flag or Hoard, plus others.
Check the box next to Refueling and close the Room Properties. I know the
other functions in this window look very interesting, but please resist
the urge! We'll use them later.
Your room is now an energy center. It does not have to look like one to be one, as in most D2 levels. Save your level...get used to doing this often. In fact, make a backup copy now and save it in a different folder, just in case. In World View run the Verify Room function. Everything should be okay except the BOA. The BOA becomes invalid whenever a face, vert, or other piece of architecture is moved or added. Even if you move just a single vert one grid unit, the BOA must be recalculated. Go to the File menu and do this now. After you're finished, go to the Window menu and calculate the lighting for the entire mine. Use the same settings you used in Lesson 5. Once again, save The Level. Use the MN3 packager to save and test your level. Make a new .mn3, as I've encountered errors when opening and changing existing files. Or, better yet, use D3 Quicktest, which is an excellent utility written by Nirvana. It will convert your .d3l to a .mn3, saving you the hassle, and will even start D3 for you! I consider it a "must have" for all D3Editor's - it will save you a lot of tedious work. Thanks Nirv' :) In Lesson 7 we will learn how to extrude multiple faces in order to make more interesting room designs. We will also learn how to attach a new room to our level. |
|