|
Custom Texturing Introduction To make textures you will need a good paint program (Photoshop, Paint Shop Pro...). You should have a fair understanding of your paint program, especially how to use layers, filters and effects, cloning tools, and your imagination. Where
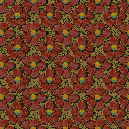
Are These Textures? We need some stock material to start with. As a texture artist, you will discover that the internet is your best buddy! You can find any kind of image you need with a little patience and some experience with a search engine. In my level, Mad Science, which takes place in a house, I wanted to make some fancy wallpaper for the living room. I had a good idea of what I wanted, but I didn't think I could draw it and make it look real. I thought of taking photos of wallpaper with a digital camera (another valid option), but I was too impatient to borrow a camera, not to mention finding the right design in someones house! So, I brought up Google's search engine and typed "wallpaper images catalog", or something similar. Up popped wallpaper dealers websites. It took a little time to find a site that had a good online catalog of their designs, but eventually I found a good one. In fact, at one site, I found thousands of nice JPEG images of wallpapers from all over the world, in every pattern and theme I could imagine. Here are a few of the ones
I downloaded...I downloaded dozens of these so I'd have a good selection,
and for possible future use. If you find a good source, download everything
you can get!
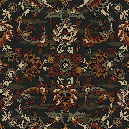
I ended up using the texture on the left for my level. I did a bit of tweaking to get it right. I mirrored it, and then made it tileable, which wasn't too difficult with this particular pattern. Later on I decided I wanted a real fancy carpet for this room to match the walls. Off to the internet!
I think I used sample number two, or a similar one. I believe it needed no additional work to be tileable. Here me now and believe me later, there is a website for EVERYTHING! Look hard and you'll find some nutball with with a site that has just what you need, including game editing tutorials :\ These are not textures that you will find included with Descent 3, to say the least! There are some texture websites that offer free ready-to-use textures, but I prefer to make my own stuff, plus many of these textures suck or are spit out by programs that make random kaleidescopish textures. HOWEVER, I am not above using an existing texture from a library as a base for a new one, or just flat out using it as is. I did find some nice wood textures somewhere that needed to be made tileable (using Photoshop's Clone tool), but other than that, I made no other changes. Incidentally, if you use someone elses work, you should use textures that are offered free or give credit to the original author, if they allow you to use them. Of course you could use them anyways, it's up to you and your conscience. If you plan on selling your work, don't rip off anyone, it could be costly. Many images that I use as "stock" imagery are just photos off the internet that I later mutilate to my desire. The above examples were samples from an online catalog. I doubt they'd mind if I use them (or so I tell myself). Anyways, to hell with legalities! We're on a mission (and I'm not makin a dime anyways so sue me)! I have designed some textures from photos that I took with a digital camera. I'll get into that in a future tutorial, but it was fun driving around rural roads and taking pics of old barns and shacks, and seeing the looks on peoples faces when they saw me taking closeup photos of their stuff (mostly from the safety of my truck which looked even more suspicious I'm sure!). What would happen if they play D3 and saw their old barn in my level!? Photos from the web too are usually easier to come by. I used
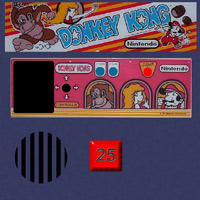
a small image of a "Programming For Dummies" book and altered
it slightly for my Mad Scientist's bookshelf:
Lastly, but not leastly, here are 3 more textures from Mad Science. I hate it when people put writing over their web images so no one can use them, but in this case, I want to wait until the level is released before I give away all of my hard work. At that time, anyone who downloads the level will be able to extract the textures. I won't have a problem with that. I just want to use them first!
I made the cardboard box ones from scratch entirely in Photoshop The skull and crossbones is a font...Wingdings I believe! The cement one started out as a stone texture I found somewhere. I did a LOT of tweaking to it. I believe it was dark reddish when I found it.Since D3 lacked any good concrete textures, I made 6 versions of this. There is a light, medium and dark version, and each version has a texture with the vertical line, and one without.They are also tileable in all directions. I used the clone tool to remove the line, then adjusted the contrast and colors for each version. This texture looks great in the game. I will release all of these textures soon, including ones not in the upcoming levels. All of the images on this page have been degraded and resized for faster loading (except for the wallpaper and carpet ones...use them). |
|||||||||||||||||||||||||||||||||||||||


 <<<
<<<
 <<
<<

